Outdoor Kitchen Layout Secrets Straight from Architects
There’s a reason some outdoor kitchens feel like a natural extension of the home while others feel like a grill squeezed onto a patio. The difference almost always comes down to layout. And if you want to get it right, the people to learn from aren’t the contractors — they’re the architects.
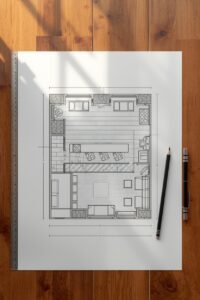
Planning a well-functioning outdoor kitchen layout is equal parts art and logic. Before a single stone gets laid, architects think through traffic flow, sun direction, wind patterns, utility lines, and how a family actually cooks together. That thinking is what separates a beautiful outdoor cooking space from one that sits unused after two summers.
Whether you’re building from scratch or redesigning a backyard that isn’t quite working, these are the layout principles architects actually apply to their own projects.
Why Layout Matters More Than Appliances
Most homeowners start their planning by choosing a grill. Architects start by choosing a position. The reason is straightforward: you can upgrade an appliance, but relocating a built-in counter means tearing out thousands of dollars of work.
A thoughtful outdoor kitchen layout determines how comfortable your guests feel, whether the cook gets trapped in a corner, and how well the space holds up through different seasons. It also affects resale value — a poorly placed outdoor cooking area can actually hurt property appeal rather than help it.
| 74% of buyers want outdoor living features |
+20% avg. home value increase with quality outdoor kitchens |
3x more use when layout connects to indoor kitchen |
Secret #1 — The Triangle Rule Still Applies Outdoors

Architects have applied the kitchen work triangle for decades inside the home: a logical relationship between the refrigerator, sink, and primary cooking surface. What surprises most people is that this rule becomes even more important in an outdoor setting, where longer distances mean more steps, more time, and more frustration.
When designing your outdoor kitchen layout, keep the total perimeter of this triangle under 26 feet and above 12 feet. Too compact and you’ll have cooks colliding; too spread out and you’re walking laps every time you grill.
“The biggest mistake I see in outdoor kitchen renovations is the refrigerator placed as an afterthought at one end of a long run. It should anchor the prep zone, not be bolted on wherever there’s room.” — common observation from residential architects
Secret #2 — Zone Your Space Like a Professional Kitchen

Restaurant kitchens run on zones — distinct areas assigned to specific tasks. Architects apply this same thinking to residential outdoor layouts, and it dramatically improves how the space performs during a real dinner party.
A complete outdoor kitchen layout typically addresses four functional zones:
| 🔥 Hot Zone Grill, smoker, side burners, pizza oven. Keep heat sources grouped and downwind of the seating area. |
🔪 Prep Zone Counter space, cutting surfaces, and access to the fridge — the workhorse of the entire layout. |
| 🍷 Serve Zone Bar area, serving counter, or pass-through window. Faces guests, not the cook. |
🪣 Clean Zone Sink, trash pullouts, towel hooks. Slightly separated from food prep for hygiene purposes. |
Failing to zone the space is why outdoor kitchens become cluttered and chaotic. When everything competes for the same surface, cooking outside stops feeling like a pleasure and starts feeling like a chore.
Secret #3 — Orient Around Sun, Wind, and Smoke

This is where architects earn their fee. A grill positioned incorrectly relative to prevailing wind direction will push smoke toward your guests — or back into the cook’s face — every single time you use it. Architects study site orientation before committing to any layout on paper.
The general rule is to place cooking appliances downwind of the main seating area. But this requires actually standing in your yard at different times of day and noting where breezes come from, which is something most homeowners skip entirely.
Sun direction matters too. A prep counter that faces west will have afternoon sun blasting directly into your eyes during peak grilling hours. West-facing seating areas heat up uncomfortably fast in summer. Architects typically orient primary cooking surfaces to face north or east, with shade structures added on the south and west sides where needed.
Architect’s Tip
Check your backyard’s wind pattern at 4 PM on a warm day — that’s usually when you’ll be grilling. If the breeze typically moves from west to east, position your grill on the eastern edge of the space so smoke blows away from the seating area naturally.
Secret #4 — Counter Depth and Height Are Non-Negotiable

Standard outdoor kitchen counters sit at 36 inches high — the same as interior counters. This works for most people, but architects increasingly spec slightly lower surfaces (34 to 35 inches) for outdoor cooking because people tend to stand differently outside, often on uneven ground or with shoes that have more sole than typical indoor footwear.
Counter depth is just as critical and often overlooked. A depth of 25 to 30 inches gives enough room for appliances, a cutting board, and tools side by side. Anything under 24 inches and you’re constantly shuffling things to make space. Anything over 32 inches and reaching the back of the counter becomes awkward.
Architects also insist on a minimum of 12 inches of landing space on each side of the grill — a buffer zone for hot pans, platters, and tools. It sounds generous until the moment you’re pulling a full rack of ribs off the grate and have nowhere to set them.
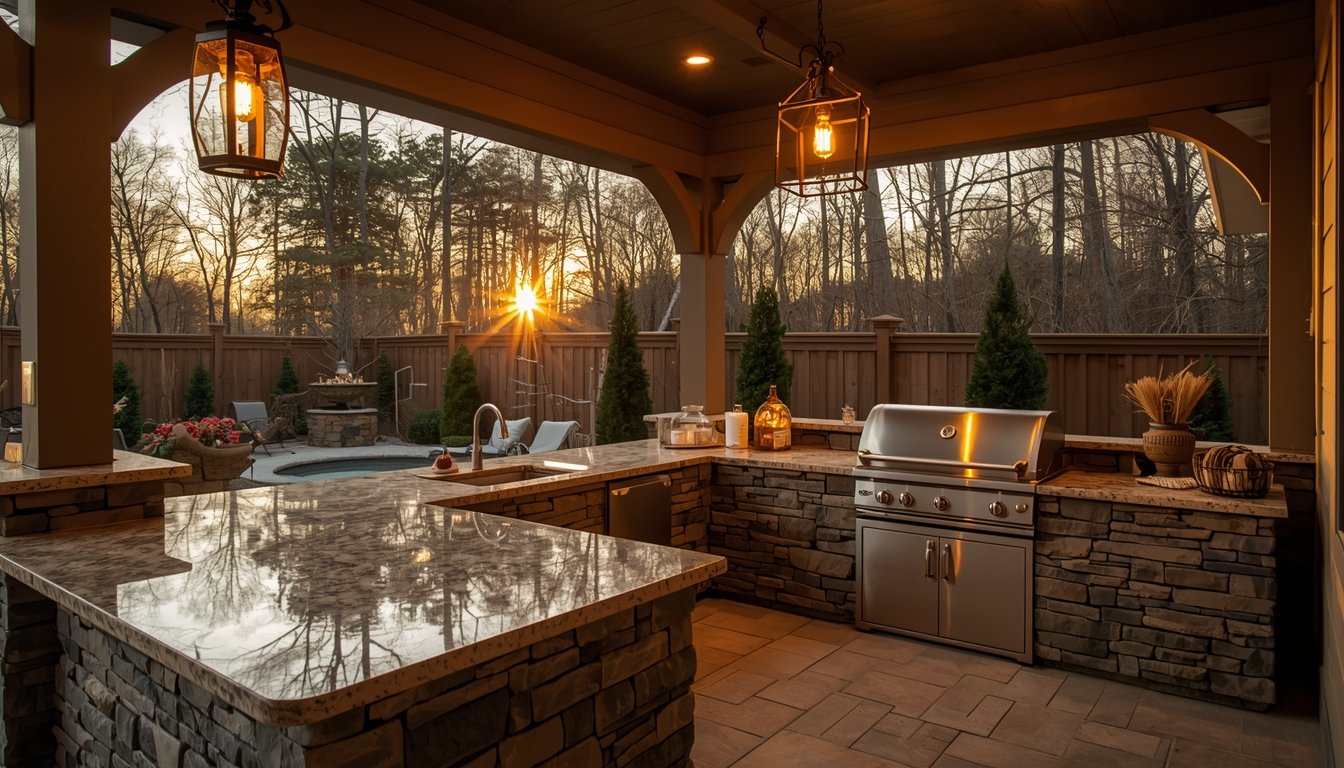
Secret #5 — Think in L-Shapes and U-Shapes, Not Straight Lines

A single straight run of outdoor kitchen counter looks sleek in photos. It works terribly in practice. The cook has no corner to turn, no enclosed workspace, and guests inevitably crowd the one side that’s accessible — right where food is being prepared.
L-shaped outdoor kitchen layouts are the most efficient for smaller spaces. The corner creates a natural prep hub, keeps the cook slightly sheltered from foot traffic, and allows guests to gather along the longer leg without interrupting the cooking flow.
For larger entertaining spaces, U-shaped layouts offer the most functional square footage. The cook works in the interior of the U with everything within arm’s reach, and the outer edges become natural serving surfaces or bar seating. Architects particularly favor this shape when integrating multiple cooking appliances — a grill on one leg, a pizza oven on another, and prep and sink functions connecting them.
Secret #6 — Connect Indoor to Outdoor Intentionally
The most-used outdoor kitchens in architect-designed homes share one thing: a clear, short path to the indoor kitchen. This isn’t just about convenience — it’s about how real cooking actually works. Condiments get forgotten, extra serving dishes are needed, paper towels run out. If the outdoor kitchen is isolated on the opposite side of the house from the interior one, you’ll end up cooking inside by default.
Architects aim for the outdoor cooking area to be visible or directly accessible from the interior kitchen through large glazed doors, a pass-through window, or a covered walkway. This visual connection also makes it easier to supervise children or watch guests while managing multiple things at once.
A pass-through window between the indoor and outdoor kitchen is one of the highest-return design features you can add. It costs far less than a full outdoor kitchen expansion but dramatically increases how much both spaces get used.
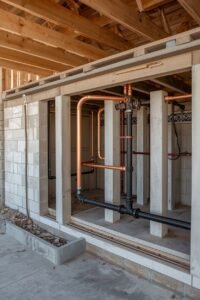
Secret #7 — Plan Utilities Before You Plan the Aesthetic

Running gas lines, electrical conduit, water supply, and drainage is the part of outdoor kitchen planning that gets skipped or underestimated most often. Architects plan utilities first because relocating them after the fact is expensive and sometimes impossible without ripping out completed work.
Gas lines must meet code clearances from structures and combustibles. Electrical circuits for outdoor kitchens require GFCI protection and weatherproof covers. Drainage for a sink needs a slope and an end point — either a dry well, a connection to the municipal system, or a greywater setup that complies with local regulations.
One detail most homeowners miss entirely: outdoor kitchens should have dedicated electrical circuits, not shared ones. Running a refrigerator, a warming drawer, and a blender on the same circuit as patio lighting will trip breakers constantly.
Secret #8 — Design for Your Climate, Not a Catalog Photo
The outdoor kitchen layouts you see in design magazines are often photographed in Southern California or coastal climates that bear little resemblance to most backyards. Architects design for the actual climate their clients live in, and that changes everything from material choices to how the space is oriented.
In humid climates, ventilation and drainage dominate the design decisions. Stagnant water destroys wood cabinetry and accelerates corrosion on metal components. In cold climates, the layout must account for winterization — shutting off water lines, covering or storing appliances, and protecting countertop surfaces from freeze-thaw cycles.
Hot, dry climates require shade planning from the beginning. A beautiful outdoor kitchen that sits in direct afternoon sun becomes unusable by July, regardless of how well the layout functions in every other way.
The Bottom Line on Outdoor Kitchen Layout Planning
Getting your outdoor kitchen layout right isn’t about spending more — it’s about thinking before you build. The architects who design exceptional outdoor cooking spaces spend far more time analyzing the site, the homeowner’s habits, and the local conditions than they spend choosing tile or fixtures.
Take the same approach. Walk your yard. Note the sun. Feel the wind. Measure the distances. Then design a layout that works for the way you actually cook and entertain, not the way it looks in someone else’s backyard.
That’s the real secret — and it costs nothing to apply.